

One of the most difficult questions to answer in our industry is, “How long should my plate last?” Or, in other words, “How many feet should I expect to get out of my photopolymer plates?” Considering the number of factors that must be taken into consideration, certainly anyone faced with this question should hesitate at least momentarily before answering.
There are a number of people who have an effect on the life of a photopolymer plate:
- The raw material handlers are charged with controlling the both the way material is stacked and the atmosphere in which the material resides prior to its delivery to the plate room.
- Actions taken by the platemaker can affect image quality, plate thickness and relief, along with tackiness and final durometer. All of these aspects can affect the life and longevity of the photopolymer plate.
- The mounter selects the mounting tape, which could have very little compressibility, or maximum compressibility and resilience for screens and process work.
- The skilled press operator determines the ink setting and impression, while the press helper can hold the responsibility of controlling the type of solvent added to maintain viscosity.
- Prepatory personnel may be in charge of cleaning, removal, and filing of the photopolymer plates once the order has been produced.
Raw Material Handling
If plates are being made in‐house, it is very likely that Shipping and Receiving personnel will be the first individuals who can have impact on the life of the finished plate. When the raw sheet material is received, it is important that we consider this product as a semi‐solid, or being in a Jell‐O like state. Therefore containers or boxes of raw sheet material should be transported and stored flat and never on end. Raw plate material stored on end will begin to feel the effects of gravity, and the polymer will naturally want to flow downward. The results are sheets that become fused together on the edge facing downward and can also have an effect on the uniformity of the sheet thickness.
When storing the raw material, the area temperature may range from 40° to 100°F (4° to 38°C). However, do not store the raw material near direct heat sources. While humidity is not a direct threat to the material, boxes should be kept dry, as direct exposure to water could affect box strength and compromise the protection of the contents. When storing these boxes, only those of the same size should be stacked upon one another. Putting a smaller box on top of a larger box could compress the lower box and compromise the quality and uniformity of the material in the lower box. Stacking a larger box on top of a smaller container leaves the edges of the material unsupported and could result in the release of the protective cover sheet(s).
Boxes of raw material should also be equal to or smaller in size than the pallet used. Boxes left to overhang pallets or shelves will also be unsupported and are susceptible to damage. Inside each container should be paper or foam liner sheets, which separate each raw sheet of polymer. When storing and stacking finished plates, these foam sheets are used to prevent damage by layering foam sheets between each stacked plate. Some polymer manufacturers recommend not stacking plates more than 6 inches high.
It is in platemaking that the UV light sensitive material becomes vulnerable. UV light blocking film, shields, or tubes should be used on lighting inside the plate room, including over the fluorescent lamps inside the light table. While UV light is the source of polymerization of the material, it can also pre‐expose raw material or damage finished plates. If the temperature of the platemaking rooms differs greatly from the raw material storage area, the raw material should be adapted prior to the manufacturing of the plate. Once the platemaker trims the raw material to the desired size, the remaining material to be used later should immediately go back into the box or drawer that assures it is protected from UV light and ozone. Other than handling the material with great care when going from one stage of the platemaking process to the next, the plate maker’s ability to affect plate life is primarily through their optimization, testing, and verification of the exposure, processing, drying, and finishing processes.
Through the use of a back exposure test, the platemaker determines the time required to achieve proper plate relief. Excess plate relief results in image areas lacking support and premature wear, especially in screen and process areas. The main exposure test is used by the platemaker to ensure that the image is well supported and adequately anchored to the floor, while holding areas requiring a minimum dot and not filling in reverses. Both over and under exposed plates will most certainly lead to a plate lacking longevity.
The processing test is used to determine the minimal amount of time required to remove the un‐polymerized material down to the floor. This process is true of solvent, thermal, and water processes. Failure to remove all of this unwanted material will affect plate relief, and sometimes affect the uniformity of the plate floor. If the plate was not completely dry before going into post exposure and light‐finishing, solvents could be locked into the plate surface and affect finished plate thickness. Uneven plate thickness results in the press operator increasing impression to the lowest point on the plate to achieve ink transfer. This over‐impression then results in pre‐mature plate wear.
Finally, the platemaker determines the minimum time required to post expose (UV‐A) and detack, or light‐finish (UV‐C). Post exposure ensures that all material on the plate is completely exposed, while the exposure to UV‐C is to make sure that the tackiness is removed from the plate. Both processes affect durometer (hardness) of the plate along with the surface tension of the face. Hardness and surface tension both affect the ink releasing characteristics of the plate. When the plate is out of spec, then the press operator is left to try to compensate through non‐standard ink and impression settings. It is at this point that the plate is ready to be trimmed to its finished dimensions. The trimming of the photopolymer plate can be performed either by the platemaker of the plate mounter.
Plate Trimming
The key to minimizing plate damage during the trimming process is to use a cutting device that cuts smoothly and in a fluid motion. Scissors often leave a jagged edge which can result in plate tear during the demounting process. While the best method of plate trimming is done with automated systems like Kongsberg digital plate cutters, most of us rely on hand held rotary cutters and razor cutters. When cutting with these systems, two focus areas are stagger cuts and the angle of the cut. When there is a 90 degree stagger in the plate design, that inside 90 degree cut can be a source of potential plate tear. Where two inside cuts meet, always be sure to punch a radius at this point. This can be done with an industrial hole punches, which come in a variety of sizes. Most often a ¼” diameter hole punch will be ideal. The second area of focus is on the angle in which the cut is made. A straight 90 degree cut is often fine to hold down thinner plates with very little copy. However, thicker plates, or plates with heavy copy running to the plate edge in the machine direction have greater surface tension which often lends itself to plate lift. It is because of plate lift issues that cutting the plate on a bevel is suggested to maximize the plate adhering to the mounting tape (stickyback). Always be sure that the bevel faces away from the plate face. In other words, the mylar layer should extend further than the polymer portion of the plate. Cutting this angle reversed will leave the layer of polymer unsupported by the dimensionally stable layer of the mylar and can lead to plate tear upon demounting, plate lift during the press run and even print defects if this is an area that should support the plate face.
Plate Mounting
If prolonged exposure UV light is a possibility in the mounting area, UV blocks should be utilized. Often it is the mounter’s responsibility to trim the plate to fit the cylinder. When a large plate contains multiple staggered lanes, the result is often a zig‐zag or jagged cut. At any point where two cuts meet at a right angle, a punch should be used to provide a radius at the corner of the two cuts. This radius will allow for easier plate removal and minimize the likelihood of the plate tearing. Stickyback, or mounting tape selection also has an impact on plate life when combined with the uniformity of the plate and the expertise of the press operator to achieve impression settings.
The compressibility of the mounting tape is typically dictated by the type of print required, i.e. solids, combo, or screens. The more compressible the tape, typically the less force the plate takes. However, if the compressibility results in pin‐holing, then the operator’s typical response will be to adjust impression, thus affecting plate life. Once the plate is mounted and staged for pressruns or cleaning, it should be wrapped in a black or opaque poly with the edges sealed to protect against UV light and ozone. In years past, mounters and press operators alike have used release sprays in screened areas of photopolymer plates in hopes of minimizing dirty print. While some people do find this beneficial, it is important to remember that the sprays used are temporarily changing the surface energy of the plate face and therefore could adversely affect ink release.
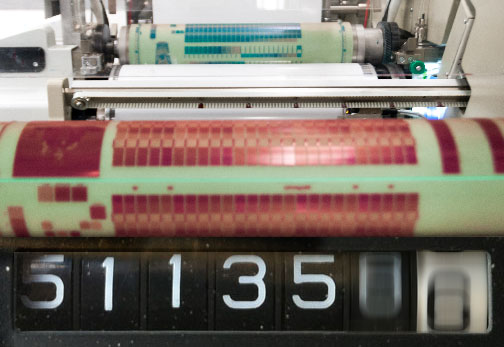
Press Crew
One of the most vulnerable times for plates to be damaged is when putting print cylinders in and taking them out of the press. Often in wide web CI (central impression) applications, the drain from the ink pans come in close contact with the mounted printed cylinder, thus extreme caution should be taken. While it is not always feasible to block all UV light in a pressroom, one area that can be addressed is between‐color lighting that comes in very close contact with the photopolymer plates. Setting final ink and impression settings at press speed will help in achieving the kiss impression needed to maximize plate life.
Understanding your ink system, extenders and cleaners is important in maintaining not only plate life, but also color, viscosity, and pH. Some solvents are not compatible with photopolymer plates above certain levels. Adverse effects to the plate from some solvents include swelling, shrinking, cracking or softening. Pure, 100‐percent esters, ketones, and glycol ester should be avoided. However, some can be considered used as a co‐solvent with normal propyl alcohol at a much diluted dose. While some consider the use of aliphatic/aromatic hydrocarbons acceptable if used as a co‐solvent at 1 percent to 5 percent, it is a good idea to avoid these altogether. Most alcohol/glycols are acceptable for use with photopolymer plates, with a few exceptions which include undiluted octyl, benzyl, and methyl. When adjusting pH, most amines are compatible, with the exception of morpholine.
A swell test can be performed to determine the level of compatibility of the solvent and the photopolymer plate. If swelling is less than 50 microns and there is a loss of less than 3 Shore A, then the solvent would be considered resistant. If swelling is 50 ‐ 80 microns and there is a loss of 3 to 7 Shore A, then the solvent would be considered conditionally resistant. If swelling is greater than 80 microns and there is a loss of greater than 7 Shore A, then the solvent would be considered non‐resistant.
It is in the pressroom that ozone is often most apparent. Ozone (O3) is a highly reactive gas compound composed of three atoms of oxygen. Ozone occurs both in the Earth's upper atmosphere and at ground level. In areas such as a pressroom, the most likely generators of ozone are electrical motors and corona treaters. If you experience plate cracking attributed to ozone, you can contact your platemaker or photopolymer supplier and request an assessment of the area in question. Ozone measuring devices measure ozone in parts per billion.
Cleaning and Removal
In order to maximize plate life, plates should be cleaned immediately after the pressrun. Plates should be cleaned with a lint‐free cloth that is free of any harmful debris, or a soft natural bristle brush to safely remove ink in screen and process areas without damaging the highlight dots. Do not use nylons to clean plates. The nylon material acts as a grater in fine highlight dot areas. NP alcohol may be used sparingly to clean polymer plates. However, plates should not be soaked in any cleaning solution. Acetate should not be used to clean plates. However, if acetate is used press‐side or for cleaning purposes, it should be used in a reduced solution no greater than 20 percent. Plates are to be completely dry before stacking and stored flat. Plates should not be rubbed in order to dry. Blot or blow them dry, using a lint‐free towel or cloth.
Extreme care is required when demounting photopolymer plates. Some plate manufacturers supply demounting tools which assist in the removal of the plate from the cylinder. No sharp objects or knives should be used, as they could damage the plate. Starting at the edge of the mounted plate, slowly pull the plate from the mounting tape while working your way across the print cylinder. Once the plate has an exposed flap across the print cylinder, grasp and peel the plate from the cylinder wrapped in mounting tape. If the mounting tape is very aggressive or if adhesive transfers to the back of the plate, a small amount of alcohol may be applied between the stickyback and mounting tape. The alcohol will assist in breaking down the adhesive layer.
Plate Storage
Plate, sleeve, and cylinder storage systems vary from convertor to convertor. Regardless of the system used, minimal contact minimizes damage, a suitable temperature for storage is required, and there must be protection from UV‐light and ozone. The ideal plate storage area ranges from photopolymer manufacturer to manufacturer. Some recommend a cool, dark, and dry environment, i.e. 59 ‐68°F at 55 percent relative humidity (+/‐ 5 percent). Others find that temperatures ranging from 40‐ 100°F is acceptable with little or no humidity control. UV light filters should be used over all lights and windows. When storing plates flat, protect the plates from lighting sources by placing them in black poly bags and sealing them. When available, use the foam liner sheets that were supplied with the raw polymer material or paper sheets between each stacked plate to prevent damage when storing finished stacked plates. Remember, some photopolymer manufacturers recommend not stacking plates more than 6 inches high.
So now that you know all the factors involved, the next time you ask someone, “How long should these plates last?” you should hope the response does not come too fast, and is not too definite.
ABOUT THE AUTHOR: Tim Reece is a member of All Printing Resource's Technical Solutions Team, where he has been employed for the past 17 years. He has 33 years of experience in flexographic printing, and has been certified by the NCSS (National Council of Skill Standards) in Graphic Communication at an Expert level.