
Sometimes we just need to get back to the basics. In flexo printing, it doesn't get much more basic than setting impression on press. Setting proper impression for every job can mean better quality and less downtime. Let's explore a couple ways to ensure you're making your best impression!
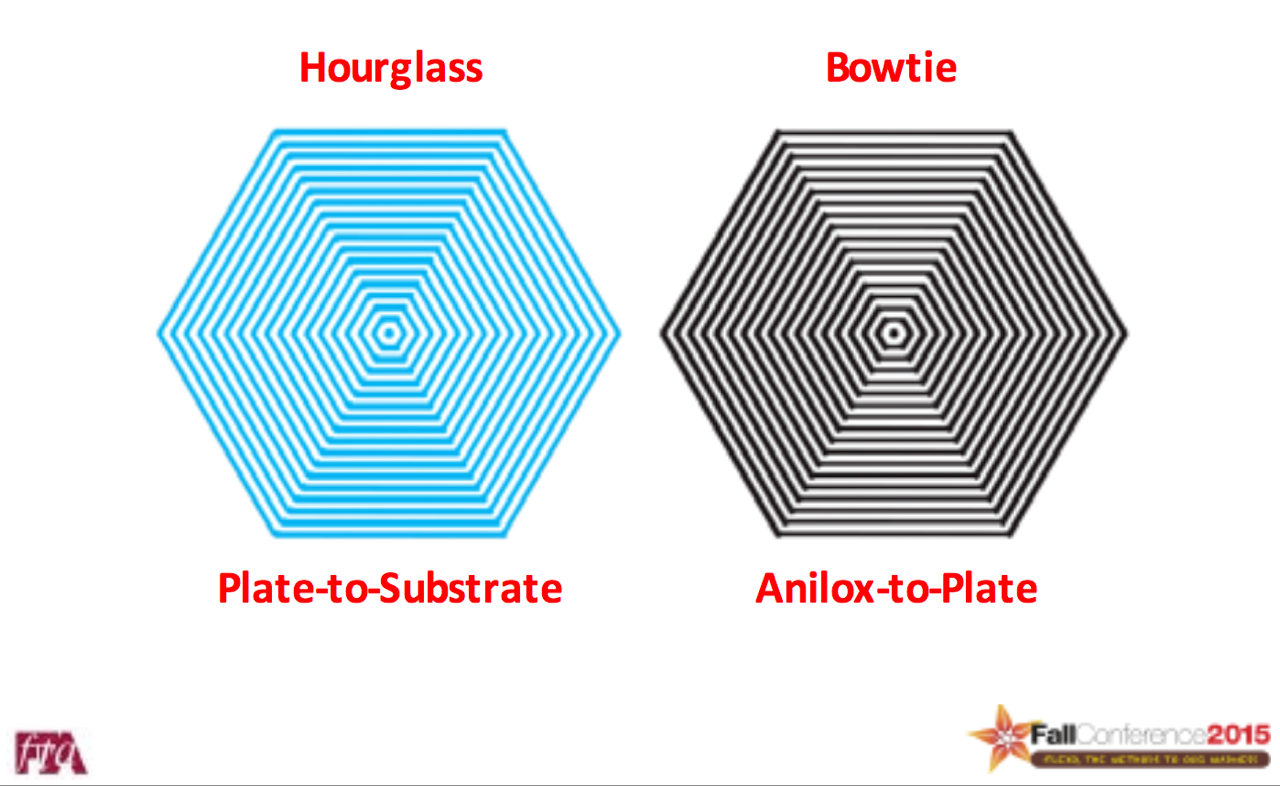
Image courtesy of Joe Tuccitto, FTA.
- Use Marks ...Yes, Really! Remember those little striped hexagonal marks that you see on many test targets? Impression targets (also called slur targets or squash-bugs) are quite useful and great to include alongside your bearer bars and/or control patches. I rarely see them used anymore but they can provide a wealth of information! See the image to the right...
- Measure the Midtones If you do not have room for the impression targets, you can always measure your 50% control patch (I know you're using control patches ...right?!). The 50% dot should gain up to 67-70% if the correct curves and impression settings are being used. If you are measuring above 70-72%, check your impression.
- Automate It!
Today's most advanced printing presses can set impression for you! They use a highly accurate camera system to monitor the print and ensure just the right amount of squeeze is being used to optimize the print. To see this in action, come see the Bobst Firenze (formerly Gidue) press in APR's demo lab, or watch this video: